ANI220 Week 8: Bull/Toro’s Face Morphs

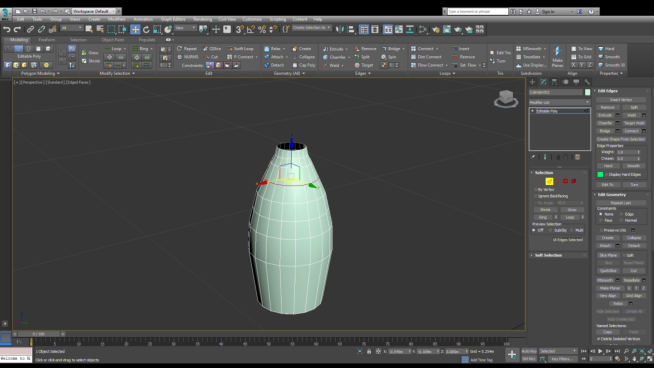
The past week, I only worked on applying face morphs for the matador. This week, I worked on applying face morphs for the bull, Toro. With the same method, I clone the body and hid everything except the face.

Morph Proof (2).png

I used soft selection to change the structure of Toro’s face according to the facial expressions’ topology. I made the first expression with his eyes closed, so that when I animate, the bull can blink. I also made the bottom eyelid move up a bit along with the cheek so that it creates a stretch effect.

 Next, I moved or stretched up the eyebrow areas to give off a raised eyebrow or a shock look.

 Unlike the human face, the ends of the bull’s lip are not tilted. I made the angry expression by moving the top part of the end up and curved. I moved the end of the lips down, so on the side of the lips, there is a curve that shows a rise and fall shape. After adjusting the lips, I also moved the eyebrow areas down and pulled it to give off a squish effect. Between the eyebrow areas, I also changed the topology of that area to have a down, curved flow. I also pulled the area because just as the eyebrow areas bulge out, the area between them result with the same effect.

Screenshot (577)


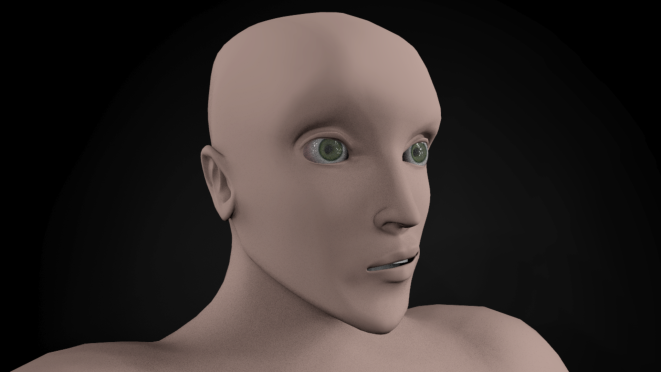
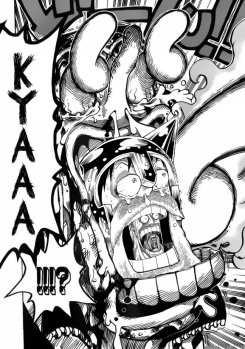
When making a pout expression, I pulled each ends of the lip and tilted it one side and another. I move the ends of the lip closer to each other to make the lips thin and small. Also, when Toro makes a pout expression, the front of his lips bulges out. I moved the top, front area of his lips up and pulled it. I also vertically tilted the lips a bit to make it have a curved shape. I also applied the same step towards the bottom part of the lip by moving it down, pulling it, and tilting it down. Here is what Toro’s expressions look like:

Screenshot (578)

Screenshot (579)

Screenshot (580)

Screenshot (581)


ANI220 Week 7: Face Morphs

After finishing the textures of the props from the past week, I worked on applying face morphs for the characters. I start off with the matador’s face by copying or cloning the body. With the body clone, I selected most of the polys of the body to hide them except the face, so that I can change the expression. Before I changed the face expression, I kept the original copy neutral, so that I can keep it as backup and a prepared object to clone. After leaving a copy, I cloned the copy again to change the expression of the matador’s face.

Morph Proof (1).png

I used soft selection tool to move certain number of vertices on areas and molded the face according to the references that I took such as this picture:

blog_facial_tests.png

http://polycount.com/discussion/94452/first-head

The soft selection helps me change the structure of the face smoothly without having the face distorted. I can control vertices on certain areas to move whenever I mold the face. For example, if I want to make the character blink his eyes, I had to make sure that there’s a bounce or a stretch. I structured the blink by moving his upper eyelid down and position it to cover his eye. I changed the topology of the eyelid so that it will have equal spacing. I also moved up the down eyelid along with the top of his cheek to add a stretch effect whenever the face blinks.

 When making a smile expression, I moved the two end sides of the character’s lips to move up. I selected one side to tilt and applied the same step to the other side. I selected the ends again and moved them apart to make the smile have a stretch. After that, I molded the cheeks to bulge out whenever the character smiles. So, around the mouth, I selected the curved line of vertices to push it in. Then I selected areas on the cheek to pull out because whenever a person smiles, it changes the structure of the face. I even stretched the areas of the nose on certain expressions such as disgust. 

Here is a result of the expressions that I’ve made on the matador:

Screenshot (571)

Screenshot (572)

Screenshot (573)

Screenshot (574)

Screenshot (575)

Screenshot (576)


ANI220 Week 6: Vray Texturing

Last week, I worked on unwrapping the props that I was tasked to model. After unwrapping the props, I worked on texturing the hot sauce bottle and the table. I textured the bottle by applying vray materials or shaders. From what I’ve learned from my lecturer, I adjusted the colors of the reflection, refraction, and the fog color.

 When I changed the reflection color to grey, the bottle will have a little reflection of the area around the bottle. I also decreased the glossiness so that the reflection will not be sharp. I changed the refraction color to white so that the glass bottle would be transparent and it helps distort the reflection of any liquid if applied inside the bottle. I applied a gradient fog color for the bottle by adjusting the gradient ramp parameters. The last color on the right end of the parameter is the darkest of the color while from the middle to the left are brighter and lighter color. I chose red since our product is a spicy sauce. Most bottles in real life look gradient if colored.

Screenshot (582).png

 I made a model of a liquid sauce by first creating a clone of the bottle. I hid the original bottle and deleted polys of the top area so that the height of a liquid sauce will be shorter than the bottle. I capped the empty area to cover the hole and used the cut tool for the polys have four sides. I chamfered the capped edges to make it rounder. After making the liquid, I unhide the bottle and pushed the liquid to make it fit inside the bottle. I then inserted a vray material and adjusted the settings to make it have the same texture of a sauce. I changed the diffuse color to orange red since it’s a spicy. Then I changed the reflection color to light grey since a lot of liquids have reflections. I also changed the refraction color to dark grey for the liquid to be a bit transparent. In both the reflection and refraction settings, they have an option called exit color where it shows the color refracted on certain areas when the ray reached a depth.

 I applied another vray material on the bottle cap and adjusted the settings to make the object a bit metallic.

 After I finished texturing the bottle and its features, I then textured the table and its legs with another vray material. I textured the legs by changing the diffuse color to grey. I then changed the color of the reflection color to a light grey so that it has a bit of light reflecting or bouncing off from the legs. I decreased the glossiness so that the reflection will not look sharp. As for the table itself, I only changed the diffuse color to almost white and changed the reflection color to grey so that the reflection will be barely visible to make have a plastic or a cardboard texture. The glossiness is also decreased in order to not have a sharp reflection.  

screenshot-440.png

ANI220 Week 5: Prop Modelling part 2

Last blog, I explained on how I was modelling the table legs. The past week I worked on modelling extra features for the table such as the parts that act as a folding mechanic and a brace.

On the curved part of the table leg, I inset the center of the curved leg area to extrude and create a horizontal bridge or a brace to connect with another leg. I also adjusted and fixed the connected brace with the table leg so that it will not look deformed.

Screenshot (563)

After making the bridge, I chamfered the sharp edges to make them all have curved sides.  I added another feature that acts as a folding mechanic. I made it first with a box shape and chamfered the lines or edges to be round. I added a short cylinder object to act as a screw that connects the folding mechanic feature with the table. I copied the same box and used it as another folding mechanic object. I also used a screw object to connect with both  features.


Screenshot (565)

I adjusted the first folding mechanic feature by applying edges next to the screw. I added edges to select the face area between them and extruded it out to make it as a block because when the table folds, the feature stops at a certain angle. After that, I created another box object that acts as a bridge support under the table. It connects with the other leg when it is symmetrically mirrored. I made that feature by adding horizontal edges make certain faces to select and extrude. I extruded the from the side and made rectangular bridge across the bottom of the table. After making the bridge. I chamfered the edges the make the feature have round corners and curved sides.

Screenshot (569)

After I fixed the base of the legs with its features, I checked on the cylinder screws and adjusted it to make it have curved sides such as the head feature on the screw. Here is what the table looks like:

Screenshot (568).png

ANI220 Week 4: Prop Modelling

Last week, I finished working on the hot sauce bottle and its features. This week I worked on making a table. At first, I made a simple table with a cloth on top, but my lecturer advised me to make a foldable table because that is what is mostly used in a film set. Here is picture that I used as reference:

Table Reference.jpg

 I start modelling a table with a rectangular box. I chamfered the sharp edges of the table to make it have curved corners.

Screenshot (564).png

 Next, I made another object to act as the table’s legs. I first made the legs with a box object. I stretched the box object to reach the bottom of the table. Next, I added another edge or line on the top area where I can extrude from the side and model a support for the table.

Screenshot (560).png

I horizontally extruded from the top side of the leg a thin, box shape. I select the faces on the top area of the thin box and extruded another up. I added two vertical and one horizontal edge on the side to give space for two faces to be selected and be extruded. I resized the extruded faces and made the end thin to form a y-shape, fork support under the table.

Screenshot (558).png

After making the table support, I added vertical edges on the leg and adjusted it to make the leg round. After adjusting the leg, I added a single horizontal edge around the center. I moved the horizontal edge and tilt it to give the leg a different shape. I chamfered the tilted edge so that the leg can have a curved shape.

Screenshot (557)

I applied the same step for other edges and adjusted the shape of the table leg. Next week, I will explain on how I modelled the extra features of the table legs.


ANI220 Week 3: Product Modelling

The past week, I was working on remaking the animatic with a different story as well as adjusting the cameras and a rough animation. When I finished the animatic and got it approved, I started working on the models while my other team members are working on the environment and the characters.

My new task was to model the hot sauce bottle and a table. This is the concept of what the product looks like:

sauce design2

I first started making a hot sauce bottle by making a cylinder with 18 sides as the base body. Next, I extruded the top of the cylinder to get a rough shape of the bottle.

Screenshot (552)

Later, I added several edges or horizontal line segments on the body by chamfering and moving the edges apart to get the proper shape according to the concept.

Screenshot (553)

On the mouthpiece of the bottle, I added more edges and chamfered them so that it will have a bumped, curved feature when a bottle cap is removed. That feature is something that holds the bottle cap when twisted.

Screenshot (554)

After modelling the body, I then moved onto modelling a bottle cap. I start off with the cylinder again with 18 sides, the same number as the bottle itself. Next, I extruded out each side of the cap to create a bump feature as what most caps have.

Screenshot (555)

Then, I chamfered around the sharp edges of the extruded faces and made each corner and its sides curved.

Finally, after chamfering the sharp edges, I inset the bottom of the cap and deleted the inset face to create a hole and chamfered the edges. I played around with the top of the cap by extruding up and adjusted the width of the top of the bottle cap to make it more appealing. Here is the final model of our hot sauce bottle:


ANI220 Week 2: Remaking the Story


This past week, after presenting our pitch to our lecturers, my team and I were criticized on several issues, such as the animatic’s camera placement, the actions of the character, the disproportion of our character, and the misunderstanding of what our product design will look like. Most importantly, the big critical issue we are having is not making the commercial relatable. So, we replanted another story of the commercial and added a twist to it. The two characters are having an intense standoff with each other only for the audience later on to realize that it is all just part of an act for a film. As the two are having a break, Toro, the bull, offers his hot sauce to the matador to help make his snack more satisfying. The matador enjoys the new flavored chips and shares it with Toro. Here is the updated storyboard made by my leader:

storyboard2


As I am remaking the animatic, I am following the staging principle of animation while roughly animating the characters and building up the story. The staging principle is a process of displaying a completely or unmistakably clear idea towards the audience. My job is to make sure that the direction of the commercial’s story will be understandable for the audience to follow. I had to make sure that the placement of the objects and the characters would be organized and be shown in turns correctly and at a correct time for the viewers to follow the story smoothly As G. Scott Owen said in his website, “An important objective of staging is to lead the viewers’ eye to where the action will occur so that they do not miss anything. This means that only one idea at a time occur, or else the viewers may be looking at the wrong thing. So, the main object should be contrasted in some way with the rest of the scene” (Owen 1999).

Here is what the animatic looks like:


References:


ANI220 Week 1: A New Project

Couple of months ago, I was working with my team on making a horror game as our project and assignment. As a result, a lot of people enjoyed our game. My team and I managed to pass, and we were able to register for our next trimester. This trimester, my new assignment is to make an animated commercial.

My role in my new project is character animation. I was given a choice to choose who will be on my team. My team and I came together to discuss and brainstorm ideas for our commercial. We had many ideas along the way, but after receiving a little feedback from our lecturers, we decided to make a commercial about a hot sauce and our product’s mascot will be a bull.

Alka, my team leader, gave me a task to make an animatic and roughly animate the characters, while the others will model props and draw out concepts. This task is to prepare for our upcoming pitch in the coming week. Here is the storyboard that my leader finalized:

Storyboard

The story in the commercial tells about a hungry Matador or bullfighter who is offered with a hot sauce by the product’s mascot, Toro. Toro wants to help make the Matador’s snack more satisfying.

To prepare for our upcoming pitch, I was assigned to animate, place the cameras, and video edit the animatic. As I roughly animate the characters in the animatic, I followed one of the twelve principles of animation called straight ahead action and pose-to-pose. I mostly used the pose-to-pose method because John Richer said in his article that, “Pose-to-pose” gives you more control over the action” (Ritchie, 2016). By following this principle, I can adjust the main poses first and then fix the major mistakes early. When I was trying to move the main character’s arm, I adjusted the rig for the initial pose on one frame and then adjusted the end pose in another frame. When I got the poses placed, I then adjust the rigs on the middle frames as an in-between. I did this because the character’s arm tends to phase through objects.


References:


ANI210 Week 12 Post-Production: Final Week

The past week, the game programmer in my team and I only revised our game before we submit it online. We managed to fix most of the bugs in our game and made the other students play the game, so that we can receive feedback. One of the problems that we faced before is the placement of the colliders. The colliders act as barriers that players cannot pass through. There were some empty areas that attracted the players but only lead them stuck with the colliders. After learning about the problem. I decided to add more trees on empty areas and make the areas packed.

 Screenshot (392).png

After I did my part in helping with the game environment and left my game programmer to fix the game, I focused on finishing my show reel turntable of every prop that I mostly worked on. One of my teammates helped made a background for the team to place his or her own props and render his or her own turntable. I placed my Stone lanterns, stairs, luggage, temple shrine, the mountain cave, trees, gravestones, and cabin on each turntable with their own grayscale and wireframe. Here is a sample of what my turntable looks like:

 Screenshot (364)Screenshot (394)Screenshot (393)

After I rendered every turntable, I compiled the rendered targa files in the video editing software, Premiere pro. I first placed a title in my video as an introduction and then imported all the rendered files of my turntable. I placed and positioned the videos next to each other and added a video transition effect called dip to white. It brings a little white flash when it changes to another video or scene. I also placed a title on each prop on the top video layer to show the viewers what prop I made and textured. I made sure that each video layer will also transition or change smoothly.

Screenshot (395).png

I left everything else that remains to my game programmers to finish the game. I somehow developed my trust with the game programmers and everyone else after building my bond with them throughout the trimester. I really enjoyed working with my team. Because of that, I get to know more about the people whom I worked with. As one website says about building work relationships, “When you trust your team and colleagues, you form a powerful bond that helps you work and communicate more effectively” (Building Great Work Relationships: Making Work Enjoyable and Productive, n.d.). I look forward to seeing what the game has in store for the audience.  

Reference:

ANI210 Week 11 Post-Production: Adjusting the Monsters & Main Menu

In the past week, after my game programmers implemented the A.I. behavior for our monsters and the waypoints, we started on adding more animations to the monsters such as the patrol and chase animation, the audio, and adjustment for its response. One game programmer from my group and I implemented the Wendigo’s chase animation and adjusted its speed.

 We also adjusted how the monster will respond if the wendigo sees the player. I overlook how the game is being programmed when I was invited to my game programmer’s place and continued to help him on how the game will be played. The game programmer had a hard time implementing the animations that was made from one of my other team mate. The challenge that we both faced was fixing the pivot point of the wendigo. The pivot point was not placed in the center of the model; in fact, the pivot point was placed far away from the model. Because of the pivot problem, it was hard for my game programmer to program the wendigo and its animation. Khatim Javed, the game programmer in my team, decided that the model will be placed as a child (the hierarchy list) under a game object and adjusted the position of the pivot point in the center of the wendigo. He will only then be programming the game object instead of the wendigo model and its animation.

 Thanks to the audio students that my team and I are collaborating with, we managed to have a collection of amazing sound effects and music background such as the monster scream and the main menu track. Khatim and I helped one of our team mates in making the main menu background. We used the Temple shrine area in our game as the background for our main menu. My animation lecturer helped us in positioning the props and directed us the angle of the camera shot. Here is what the main menu looks like:

 Screenshot (390).png

I helped Khatim implemented the audio for the monsters and edited the music for timing purposes. As we finish implementing the animations and the transitions, Khatim and I finally tested on how the Wendigos will respond such as how far should the monster spot the player and how fast should the monster be when chasing after the player. The Tsuchigomo, however, was programmed differently. Once the player picks up the last piece of the relic, the Tsuchigomo will have its sight locked on the player and it will continue to chase after the player until it catches him or her.

Tsuchigomo.jpeg

In the coming week, I hope to help Khatim fix any bugs and add extra functions to the game to make it more enjoyable.

Reference: